What is Openfoam
What is OpenFOAM?
OpenFOAM (Open-source Field Operation and Manipulation) is a powerful open-source software for Computational Fluid Dynamics (CFD). It allows engineers and researchers to simulate the behavior of fluids, gases, and heat transfer in various applications, from aerodynamics to industrial processes.
Why Use OpenFOAM?
Unlike commercial CFD software like ANSYS Fluent, OpenFOAM is completely free and open-source, making it accessible to students, researchers, and professionals. It offers flexibility, customization, and a strong community for support.
Key Features of OpenFOAM
✅ Finite Volume Method (FVM) for solving fluid equations
✅ Customizable solvers for various CFD problems
✅ Parallel computing support for high-performance simulations
✅ Open-source code that allows modifications and extensions
✅ Mesh generation tools like snappyHexMesh
Applications of OpenFOAM
- Aerodynamics (aircraft, cars, drones)
- Automotive industry (engine combustion, cooling systems)
- HVAC and building ventilation
- Marine and offshore engineering
- Biomedical applications (blood flow simulations)
Create Your First Simulation Project
Once OpenFOAM is installed, you’re ready to start your first simulation! Don’t worry, we’ll start with a simple example, a lid-driven cavity flow, which is a basic fluid flow problem.
1. Create a new folder for your project. This is where your simulation files will go:
mkdir -p $HOME/OpenFOAM/my_first_case
cd $HOME/OpenFOAM/my_first_case
2. Copy a tutorial case. OpenFOAM comes with tutorials to help you get started. Let’s use one of them:
cp -r $FOAM_TUTORIALS/incompressible/icoFoam/cavity/cavity .
cd cavity
This copies all the files you need for the cavity case to your project folder.
Step 3: Understand the Files
Let’s take a quick look at what we just copied. Inside the folder, you’ll find several important files and folders:
constant/: Contains material properties and fluid settings.
system/: Controls how the simulation runs (like time steps and accuracy).
0/: Defines the starting conditions for your simulation (like initial velocity and pressure of the fluid).
You don’t need to worry about editing these files just yet, but it’s good to know they’re there!
Step 4: Create the Mesh
A mesh is just the grid that the simulation runs on. Think of it like the layout of the area where fluid flows.
To create the mesh, just type this in your terminal:
blockMesh
This command will generate the mesh based on the settings in the project files. It takes just a few seconds!
Step 5: Run the Simulation
Now it’s time to run the simulation. We’ll use a solver called icoFoam that’s designed for incompressible fluid flow (which is exactly what we’re simulating here).
To run the simulation, type:
icoFoam
You’ll start seeing a bunch of numbers in your terminal—that’s OpenFOAM solving the fluid flow equations. It’ll run through several "time steps," and each one updates the flow.
Step 6: View Your Results
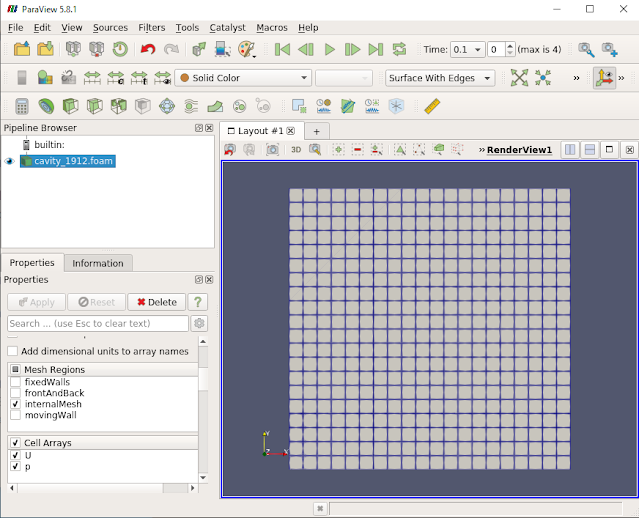
Once the simulation is done, you’ll want to see the results. OpenFOAM works with ParaView, a program that lets you visualize the flow in 3D.
To open ParaView, simply type:
paraFoam
This will open up ParaView and load your simulation, where you can look at how the fluid moves inside the cavity. You’ll be able to see things like velocity, pressure, and how the fluid behaves.
Reference
Tutorial on cavity by Cyprien rusu:
.jpeg)


.jpeg)
.jpeg)
.jpeg)
.jpeg)
Comments
Post a Comment